|
|
|||
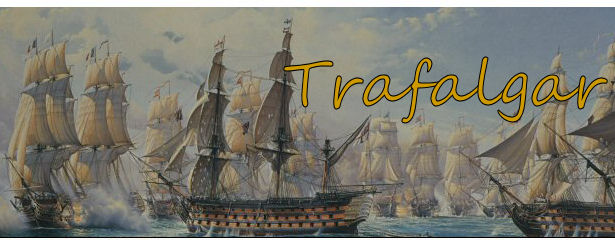
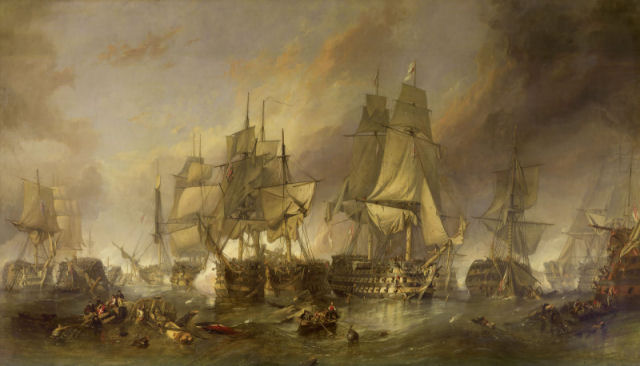
Trafalgar: Nelson's Final Battle
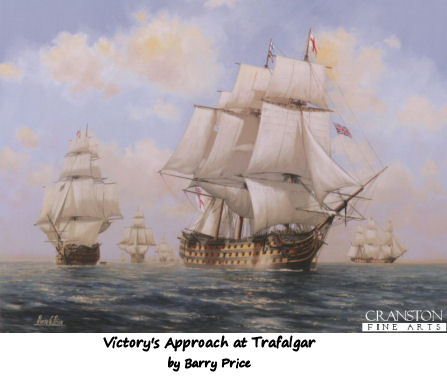
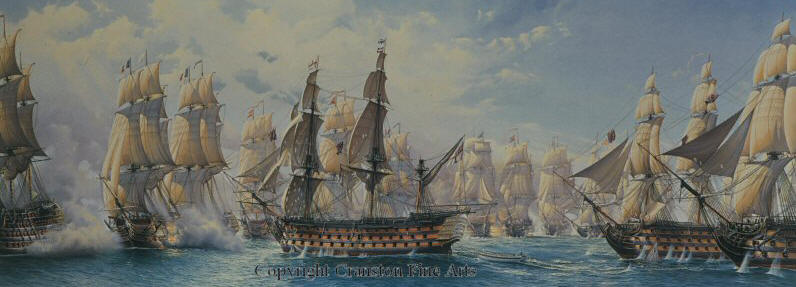
According to Nelson's plan, his fleet advanced on the French in two columns. Naturally, Nelson led one column in the Victory. The other was led by his long-term friend, Vice-Admiral Cuthbert Collingwood in the Royal Sovereign. The danger to the lead ships on the approach was great, as they were sailing straight into enemy broadsides. But when the Neptune tried to overtake Victory, and lessen the risk to the Admiral, Nelson himself hailed her Captain, Thomas Fremantle, and ordered him to drop back.
The British Fleet (27 Ships-of-the-Line)
Note: The number in brackets after each ship's name is the number of guns it had.
|
Nelson's Column (in order of sailing) |
Collingwood's Column (in order of sailing) |
||
|
Victory (100) |
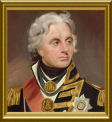
Vice-Admiral Lord Horatio Nelson Captain Thomas Hardy |
Royal Sovereign (100) |
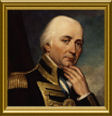
Vice-Admiral Cuthbert Collingwood Captain Edward Rotheram |
| Temeraire (98) | Captain Eliab Harvey | Belleisle (74) | Captain William Hargood |
| Neptune (98) | Captain Thomas Fremantle | Mars (74) | Captain George Duff |
| Leviathan (74) | Captain Henry Boyntun | Tonnant (80) | Captain Charles Tyler |
| Conqueror (74) | Captain Isreal Pellew | Bellerophon (74) | Captain John Cooke |
|
Britannia (100) |
Rear-Admiral Sir William Carnegie Earl of Northesk Captain Charles Bullen |
Colossus (74) |
Captain James Morris |
| Ajax (74) | Lieutenant John Pilford | Achille (74) | Captain Sir Richard King |
| Agamemnon (64) | Captain Sir Edward Berry | Revenge (74) | Captain Robert Moorsom |
| Orion (74) | Captain Edward Codrington | Defiance (74) | Captain Philip Durham |
| Minotaur (74) | Captain Charles Mansfield | Dreadnought (98) | Captain John Conn |
| Spartiate (74) | Captain Sir Francis Laforey | Thunderer (74) | Lieutenant John Stockham |
| Africa (64) | Captain Henry Digby | Swiftsure (74) | Captain William Rutherford |
| Polyphemus (64) | Captain Robert Redmill | ||
| Defence (74) | Captain George Hope | ||
| Prince (98) | Captan Richard Grindall | ||
| Frigates & Small Ships that didn't Participate in the Fighting | |||
| Euryalus (36) | Captain Hon. Henry Blackwood | ||
| Naiad (38) | Captain Thomas Dundas | ||
| Phoebe (36) | Captain Hon. Thomas Capel | ||
| Sirius (36) | Captain William Prowse | ||
| Entreprenante (8) | Lieutenant Robert Young | ||
| Pickle (10) | Lieutenant John Lapenotiere | ||
The Combined Fleet (33 Ships-of-the-Line)
|
French Ships Under Vice-Admiral Pierre-Charles Villeneuve |
Spanish Ships Under Villeneuve's second-in-command, Admiral Frederico Carlos Gravina |
||
| Bucentaure (80) |
Vice-Admiral Pierre-Charles Villeneuve Captain Jean-Jacques Magendie |
Principe de Asturias (112) |
Admiral Frederico Carlos Gravina Captain Rafael de Hore |
| Redoutable (74) | Captain Jean-Jacques-Etienne Lucas | Santisima Trinidad (130) | Commodore Don-Francisco de Uriarte y Borja |
| Héros (74) | Captain Jean-Baptiste-Joseph-René Poulain | Santa Ana (112) |
Vice-Admiral Ignacio Maria de Alava y Navarrette Captain Don José Gardoqui |
| Neptune (80) | Commodore Esprit-Tranquille Maistral | Argonauta (80) | Captain Don Antonio Pareja |
| Indomptable (80) | Captain Jean-Joseph Hubert | Bahama (74) | Commodore Done Donisio Alcalá Galiano |
| Fougueux (74) | Captain Louis-Alexis Beaudouin | Monarca (74) | Captain Don Teodoro de Argumosa |
| Berwick (74) | Captain Jean-Gilles Filhol-Camas | Montañes (74) | Captain Don Francisco Alcedo |
| Pluton (74) | Commodore Julien-Marie Cosmao | Neptuno (80) | Commodore Don Cayetano Valdés |
| Algésiras (74) | Captain Lourent le Tourneur | Rayo (100) | Captain Don Enrique MacDonnell |
| Aigle (74) | Captain Pierre-Paul Gourrége | San Augustin (74) | Captain Don Filipe Jado Cagigal |
| Swiftsure (74) | Captain C.E. L'Hospitalier-Villemadrin | San Francisco de Asis (74) | Captain Don Luis de Flores |
| Argonaute (74) | Captain Jacques Epron | San Ildefonso (74) | Captain Don José de Vargas |
| Achille (74) | Captain Gabriel Denieport | San Juan Nepomuceno (74) | Captain Don Cosmé Churruca |
| Formidable (80) |
Rear-Admiral Pierre Dumanoir Captain Jean-Marie Letellier |
San Justo (74) | Captain Don Miguel Gastón |
| Duguoy-Trouin (74) | Captain Claude Touffet | San Leandro (64) | Captain Don José Quevedoy Cheza |
| Intrépide (74) | Captain Louis Infernet | ||
| Mont-Blanc (74) | Captain Guillaume-Jean-Noel la Villegris | ||
| Scipion (74) | Captain Charles Bérenger | ||
|
Frigates and Small Ships that didn't Participate in the Fighting |
|||
| Cornélie (40) | Captain Jules François Martinencq | ||
| Hermione (40) | Captan Jean Michel Mohe | ||
| Hortense (40) | Captain La Marre le Meillerie | ||
| Rhin (40) | Captain Michel Chesneau | ||
| Thémis (32) | Captain Nicolas Jugan | ||
| Argus (16) | Lieutenant Yves François Taillard | ||
| Furet (18) | Lieutenant Pierre Antoine Toussaint Demoy | ||
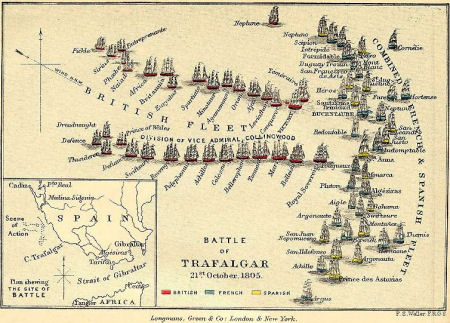
It took hours to reach the enemy. There was barely any wind, so the British ships travelled slowly, and the poorer sailers lagged behind. The inability of the Combined Fleet to synchronise their turn meant that their line had formed an arc, with the middle ships pushed even further away.
As they got closer, it was time for Nelson to send his final signals. Firstly, he wanted to prevent the enemy getting back into Cadiz. Secondly, he sensed that a storm was coming, and so he wanted the fleet to anchor after the battle. After his years in the Mediterranean, diligently recording weather conditions in detail every day, he almost had a sixth sense for it, and how best to deal with it.
He then sent his most famous signal of all, but one that has sometimes been misunderstood. He wanted to send the signal 'England confides that every man will do his duty.' 'Confides' meant 'has confidence'. But 'confides' wasn't in the signal vocabulary and so would have to be spelt out letter by letter, so would take some time. His signal lieutenant suggested substituting the word 'expects' instead, as that was in the vocabulary. Nelson impatiently agreed, as he had another signal to send and didn't want to run out of time to do it. So the signal read,
'England expects that every man will do his duty.'
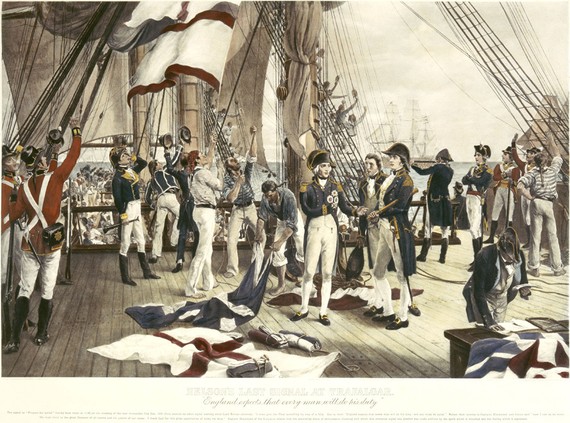
Though it became famous and is still sometimes used today (for example in the media during sporting events), it has often been misquoted (even on the mosaic floor by Nelson's tomb!), as 'England expects every man to do his duty.' And this gives it a different meaning. It makes it sound like an order, almost a warning, that they must do their duty, as if they would slack without such a reminder. In fact, the spirit in which it was meant was the opposite. Nelson, as always, had confidence in his men. He believed in them, he knew them to be more disciplined, more skilful, than their opponent. And the signal was met with cheers throughout the fleet, because the men knew of his affection for them and his trust in them, and returned it in kind.
Then Nelson sent his final signal, which was to 'engage more closely', and kept it up for the remainder of the battle. Close action was his favourite kind, and had been employed at the battles of the Nile and Copenhagen, but this time, because the enemy line would be cut into three parts, each captain would find his own target, and no ships were anchored, chaos would ensue, and there would be no time for other signals. As he had said to Captain Keats of the Superb during a visit at Merton: "It will confound the enemy and bring forward a pell-mell battle, and that is what I want."
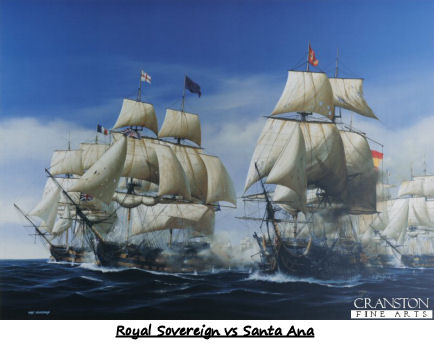
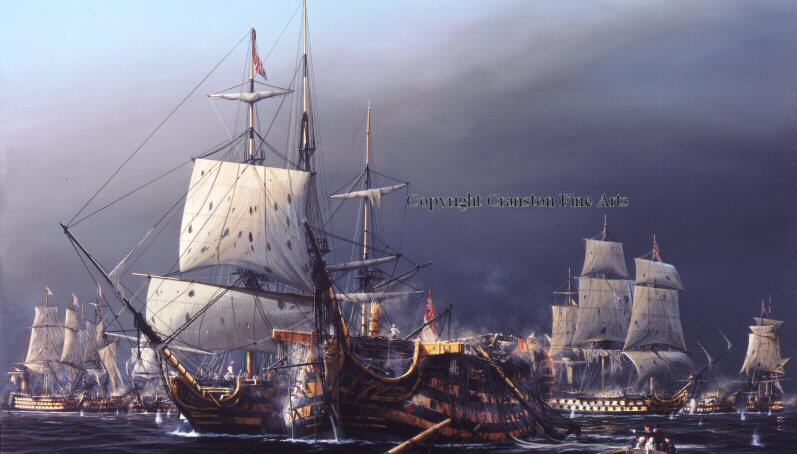
Vice-Admiral Collingwood in his flagship, the Royal Sovereign, was the first to come into range of the enemy. His ship was battered by broadsides from several enemy ships, for an agonising ten minutes, holding fire for the duration. One can only imagine the tension felt by the gunners as they suffered without being able to reply. Eventually, however, they were allowed to fire a single broadside, to create a smokescreen to impair the enemy's accuracy. But the French and Spanish gunners weren't anywhere near as competent as their British counterparts. If they had shot as well as the British were capable of doing, the Royal Sovereign would have been destroyed.
As it was, she approached a gap between the disorganised Spanish Santa Ana and the French Fougueux. They tried to close the gap, but too late, and Collingwood sailed between them, firing at Santa Ana's stern as he went. Many of the Spanish ship's men were killed or wounded, and several guns destroyed. Nevertheless, she put up a considerable fight as the Royal Sovereign pulled up alongside her, so close that her guns touched the enemy ship. Collingwood then found his flagship surrounded also by Fougueux, Indomptable, San Leandro, and San Justo.
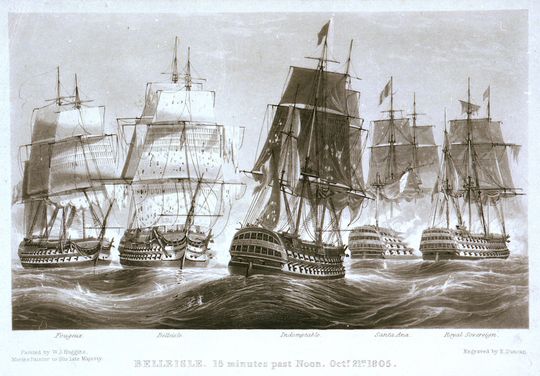
The Belleisle came next, following in the Royal Sovereign's wake through the same gap between Santa Ana and Fougueux. She lost fifty men while approaching, and her officers made the men lie down, both to minimise casualties as cannonballs flew above them (which might otherwise have taken off heads or cut men in two), and also to stop them firing in panic. Her captain, William Hargood, intended for her to head towards Indomptable, firing at Santa Ana and Fougueux as she went. But she was cut off by Fougueux, and locked with her.
The Mars was next through the line, and by this time the French Pluton had come up close to the melee around the Royal Sovereign. The Mars was able to shoot at her at point-blank range. But, in another example of the lack of communication and co-ordination amongst the Combined Fleet, Pluton had overtaken the Spanish Monarca, leaving a gap in the line between Monarca and the French Algéciras. Captain Tyler's Tonnant was thus able to sail through that gap, shooting at both of them before pulling up alongside the Monarca.
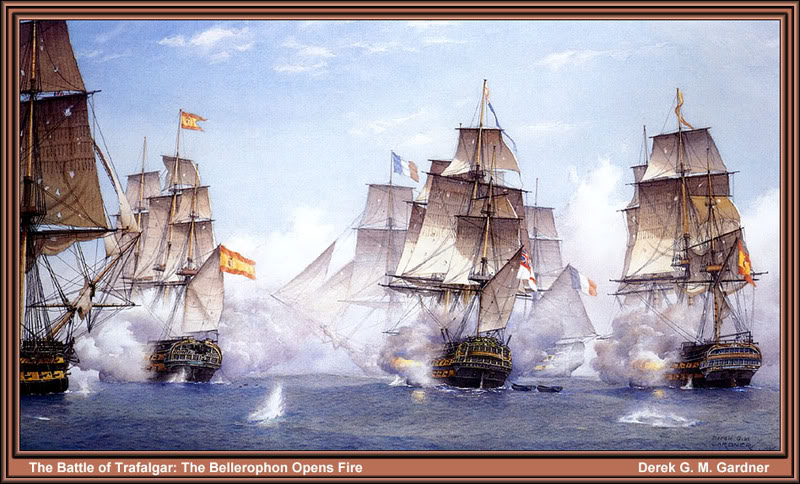
The battle was already descending into chaos, the line of the Combined Fleet broken and confused. The Bellerophon, whose crew had painted 'Victory or Death' on their guns, was next into the fray, but did not follow the others. Instead, Captain John Cooke towards the Bahama and Montañes, next in the line after the Monarca and Algéciras. Somewhat contradictory to orders, Bellerophon opened fire before reaching the line, but while the shots may have been ineffective in damaging the enemy, they helped to create a smokescreen, and boost morale. Passing between them, she shot at the Montañes and devastated the stern of the Bahama. She pulled up alongside Bahama, but quickly defeated her.
Suddenly, in the confusion, the French Aigle collided with Bellerophon which was by this time shrouded in what was effectively a smokescreen. Bellerophon now engaged her - but, further ahead, the Monarca, now with 600 men killed or wounded, pulled away from the Tonnant. But she was offered no respite, as Bellerophon decided to open fire on her, too.
The pile-up around the Aigle caused the French Swiftsure (not to be confused with the British one!) to nearly collide with her, and be forced to turn sharply away. The ruthless Bellerophon was thus able to shoot at her, too. But she was able to pull up alongside the British Colossus, which had pushed her way through further down the line.
But that was not the end of it for Colossus. While battering the Swiftsure, she was also fired upon by the French Argonaute on the other side and, from a distance, Bahama. She quickly beat down Argonaute into such a state as the French ship had to retreat from the action to repair. But Colossus endured a further one-and-a-half hours of close action with the Swiftsure.
Further still down the line, the British Revenge found a gap between the French Achille and the Spanish Principe de Asturias, flagship of the Spanish Admiral Gravina. After a gruelling battle, a boarding party from Gravina's ship attempted to board the Revenge. But a merciless canister shot from the carronades (big, powerful, deadly, short-ranged guns that were a favourite of Nelson's) quickly saw them off, and Gravina retreated. Revenge was left fighting Achille.
Nelson's Column (no pun intended)

Nelson began by taking Victory, and the ships that followed in her wake, on a course towards the enemy van, and so seemingly away from the flagship further down the line. But this was a feign, and he turned back downwards, bearing down on the Bucentaure, and thus surprising Villeneuve further.
Half an hour after Collingwood in the Royal Sovereign broke through the line, Nelson arrived in the Victory. From the start, the flagship took massive damage, being fired on first by the French Héros, the Spanish four-deck beast Santisima Trinidad and Villeneuve's flagship the Bucentaure, and then the French Redoutable joined in. Very soon, her rigging was badly damaged, and her wheel was completely destroyed. For the rest of the battle, she had to be manually steered by forty men using the tiller below deck, with instructions being run down to them.
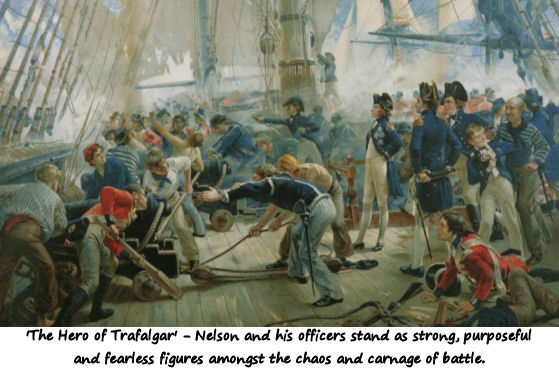
As always, Nelson was a strong presence on the quarterdeck of the Victory. He wore his normal undress uniform, but had his four orders, or stars, stitched on. Before the battle, many officers had expressed concern that such flashy adornments would surely mark him out as a target. But when his surgeon, William Beatty, thought about trying to persuade him to dress down, Nelson's secretary and close friend, John Scott, advised him, "Take care doctor, what you are about. I would not be the man to mention such a matter to him."
As Victory made her slow and steady approach, Nelson patrolled the gundecks personally, giving rousing speeches and rallying the men. They were inspired by their decorated, much-loved leader. He then returned to the quarterdeck and paced up and down with Hardy and Scott.
Before Victory was close enough to even begin to open fire, she was desperately damaged, and her crew were suffering losses. Eight marines on deck were killed by a single shot; seeing this, Nelson ordered Captain Adair of the marines to spread the rest of them out. Then, John Scott was torn in half by a cannon ball. When the Adair came to remove his body, Nelson asked, "Is that poor Scott that is gone?". When Adair nodded, Nelson repeated, "Poor Scott." Scott's body, like so many others that day, was thrown overboard. His blood soaked Nelson's stockings, which can still be seen in the National Maritime Museum in Greenwich.
Nelson and Hardy had a close shave when a shot hit the deck between them, sending a splinter flying to break the buckle on Hardy's shoe. Startled, they stopped, looked at each other and, seeing that neither of them were hurt, Nelson said, "This is too warm work, Hardy, to last long."
Withstanding all that four enemy ships could throw at them, and being unable to reply, tested the Victory's crew to the limit. Nelson said that he had never seen such courage as he did in those man that day.
Failure of the French Vanguard
Admiral Villeneuve in his flagship, the Bucentaure, watched the Victory's approach, and realised that Nelson was heading either for him, or for the Santisima Trinidad. The five ships in his vanguard (the front of the line), under Rear-Admiral Dumanoir, were far ahead of the battle and would have to turn round - and, if they didn't do it soon, it would be too late. So he raised the signal for any ship not engaged, to join the action immediately.
Villeneuve obviously intended for Dumanoir to turn round and come back to enter the action. But Dumanoir did not. He either did not think the signal was meant for him as it was not specific, and so ignored it; or it may simply be that the signal was obscured by smoke and distance. He was later court-martialled, but acquitted.
But his failure to turn back was exactly what Nelson's tactics depended upon. The Combined Fleet outnumbered his, and by dividing the line, he cut off the vanguard and made them impotent, giving him an advantage in numbers. So the longer it took them to turn round and come back to help, the better.
The Bucentaure, Santisima Trinidad and Redoutable had managed to close the gaps between them so there was no space to pass between them. Another Admiral might have chosen to turn and line up alongside them according to traditional tactics. But not Nelson. He would ram one of the ships out of the way. Captain Hardy asked which he should ram, to which Nelson replied he should just pick one, as it made no difference. So he steered between the French flagship, and the Redoutable.
As she passed, Victory fired at Bucentaure's stern. Responding to Villeneuve's signal that all ships should by now be engaged, the French Neptune, sitting just beyond the gap, fired at Victory. Victory almost collided with her, but instead rammed the Redoutable, behind Bucentaure. They locked together, their rigging become entangled with the other, and the momentum of the powerful collision carried them both out of the line.
Captain Eliab Harvey's Temeraire was one of the heroes of the hour, and deserves a special mention. The 98-gun powerhouse did not follow Nelson's Victory. Instead, Harvey took her between the Neptune and the other side of Redoutable. On the way, she shot at the Héros, which lay further up the line, and Santisima Trinidad, the the Bucentaure, and finally the Redoutable. Because she ended up in such a good position to open heavy broadsides upon Redoutable, she was instrumental in preventing the destruction of Victory, which was by now unmanoeuvrable and in a bad way and stuck at point-blank range with the Redoutable. She was shot at by San Augustin, which lay ahead of Santisima Trinidad, and San Leandro, on the other side. Her masts and rigging became badly damaged.
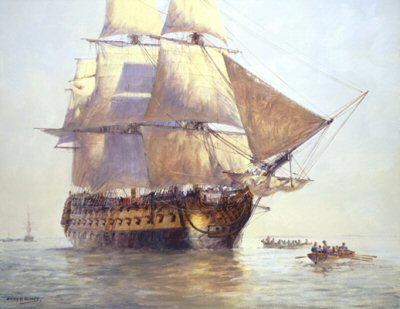
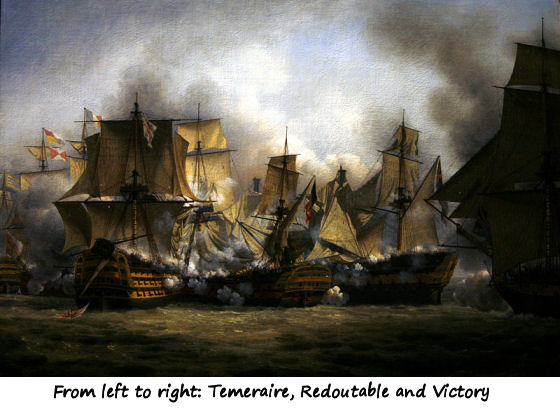
Image: The Temeraire
As point of interest, you may notice that many of the British ships suffered extensive damage to their rigging. This is because the French deliberately fired high, aiming to lessen the manoeuvrability of their opponents. The British tended to aim low, causing devastation to the gun decks. But this did sometimes mean that a British ship could become disabled before even coming in to range of the French. Fortunately for them, the French were pretty poor shots, at least in comparison to the British.
The British Neptune (confusingly, there were Neptunes on both the British and French sides, and a Spanish Neptuno!) fired at the San Augustin, Héros, and the Santisima Trinidad, as she moved down the line towards the Bucentaure. She was severely damaged by the San Augustin and Héros, but managed to get behind the Bucentaure and open fire against her vulnerable stern. She was followed by the Leviathan, which also shot at the Bucentaure and then, entering the line further along, the Santisima Trinidad.
A melee was quickly developing around the French flagship, the Bucentaure.
 The
Africa and her captain, Henry Digby, I feel also deserve a special
mention for bravery and sheer audacity. During the night before the
battle, Digby missed a signal and so in the morning found himself far to the
north of the rest of the fleet. The Africa was a relatively small
ship of just 64 guns, and not the best of sailers, so Nelson had signalled her
'to make all sail', meaning that she should speed away from the battle. An
indignant Digby, with a Nelson-like spirit, deliberately misinterpreted the
signal to mean that he should sail as quickly as possible towards the British
fleet.
The
Africa and her captain, Henry Digby, I feel also deserve a special
mention for bravery and sheer audacity. During the night before the
battle, Digby missed a signal and so in the morning found himself far to the
north of the rest of the fleet. The Africa was a relatively small
ship of just 64 guns, and not the best of sailers, so Nelson had signalled her
'to make all sail', meaning that she should speed away from the battle. An
indignant Digby, with a Nelson-like spirit, deliberately misinterpreted the
signal to mean that he should sail as quickly as possible towards the British
fleet.
There were ten - yes, ten! - enemy ships between Africa and the rest of the British fleet, and they were all much larger than her. The odds of her making it through intact looked slim. But astonishingly, Digby managed to weave her through the line, firing at each one of Dumanoir's ships with both broadsides!
As if that weren't enough, upon reaching the brawl, the plucky Africa moved alongside the Spanish giant, Santisima Trinidad, and her 130 guns! Not content with merely shooting at her, and seeing how badly damaged she was by now, Digby sent a boarding party over to her. But she wasn't ready to surrender just yet, and her commander sent the British party packing.
Still not content, Digby took Africa to engage the French Intrépide and her 74 guns. They battled for 40 minutes, until the British Orion joined in, and Intrépide was forced to surrender.
By the end of the battle, Africa remained intact, but only just. She was very badly damaged, with 62 men (including most of her officers) killed or wounded. Still, she survived until 1814, when she was broken up. Ten years later, Digby heard criticisms of his actions during the battle, which prompted Captain Hardy to write to him saying, "I beg to assure you that Lord Nelson expressed great satisfaction at the gallant manner in which you passed the enemy's line; and I assure you he appeared most fully satisfied with the conduct of the Africa."
Personally, I think it was exactly the sort of the thing that Nelson would have loved to see, and was more than likely the action he would have taken himself.
The arrival of the little Africa was the final straw that broke the back of the Santisima Trinidad. Captain Digby may have been a little pre-emptive in when he sent in his boarding party, but it wasn't long after that when she surrendered.
It was now one hour after the battle had begun. The line of the Combined Fleet was now broken and descended into chaos. Each ship moved slowly around each other, firing at whoever they could. But still, only half of the ships on each side were actually engaged, and Dumanoir's ships continued to sail further away.
By now, the fierce battle between the Victory and Redoutable was
intense and deadly. At point-blank range, the gun crews unleashed hell
upon each other. Redoutable's hull had been destroyed, and almost
every man on her lower decks was injured or dead. She closed her
ineffective gun ports to prevent the British from using them as entr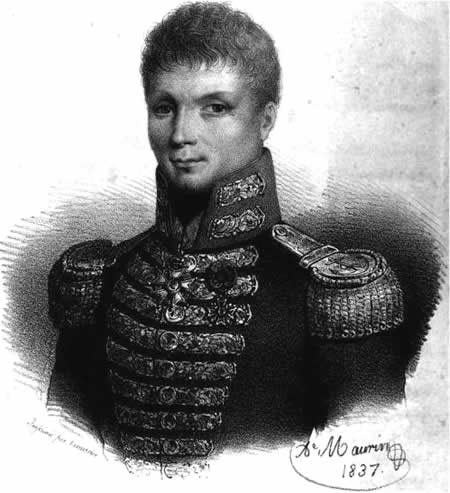 ances
through which to board. But, above decks, and from the rigging, musketeers
rained bullets down upon Victory's men.
ances
through which to board. But, above decks, and from the rigging, musketeers
rained bullets down upon Victory's men.
Redoutable's captain, Lucas, was smart. He knew that no French gunnery could match up to that of the British. And so he focussed the training of his crews on musketry and boarding. His musketeers became the best in France, and Lucas planned to put them in the relative safety of the rigging from where they could clear Victory's decks to put down resistance to the boarding parties.
(Nelson didn't like putting musketeers in the masts and rigging. Sparks and muzzle flash from the muskets could set fire to the sails - as we shall see, this did in fact happen to the French Achille later in the battle, leading to it exploding).
"They have done for me at last..."
Despite the growing carnage all about him, the smoke, the flying splinters, the hail of bullets and the cries of wounded men, Nelson continued to parade the quarterdeck with Hardy by his side. At 1:15pm, reaching the end of one such crossing of the quarterdeck, and turning back, Hardy suddenly saw Nelson collapsed on his knees. He supported himself with his one arm, until that buckled beneath him, and three seamen rushed to support him. He'd fallen on the exact same spot where John Scott had fallen earlier. Hardy ran to him, hoping he was not badly wounded, but Nelson knew. He said,
"They have done for me at last... my backbone is shot through"
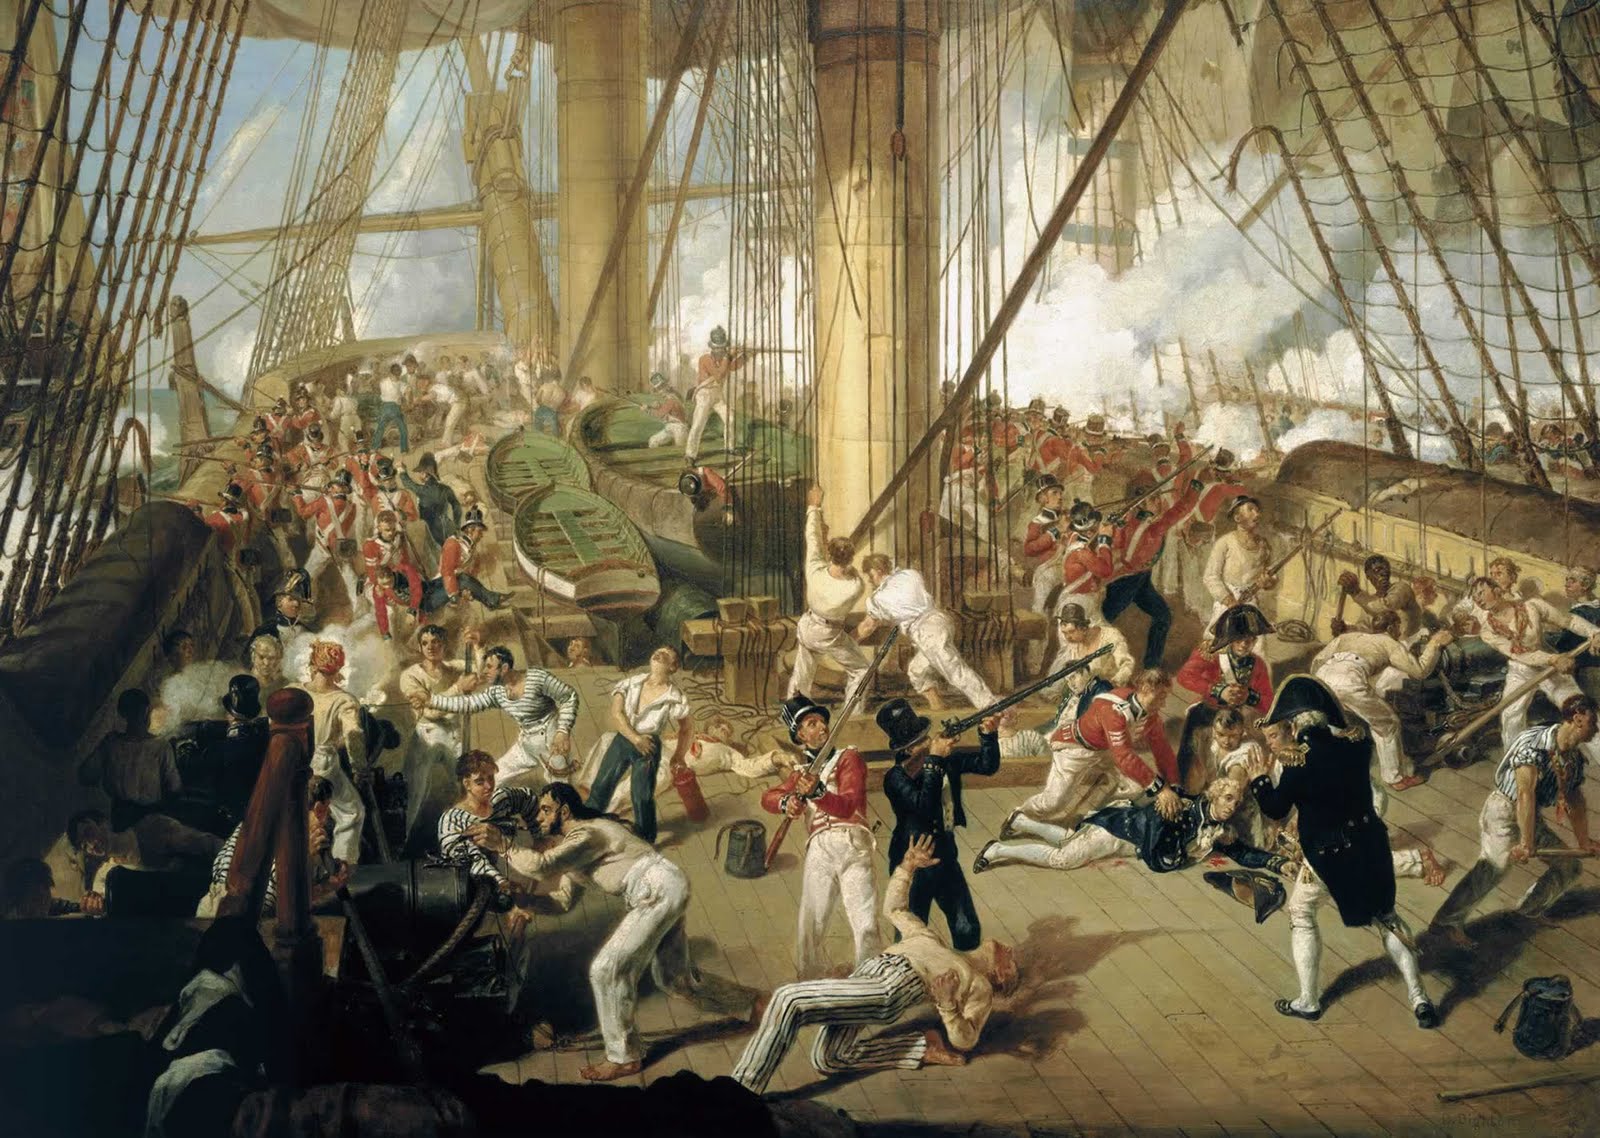
Image: The Fall of Nelson by Denis Dighton
It was an accurate self-diagnosis, not one of his dramatic proclamations as at the Nile when he'd received his head wound. Before being carried below deck, Nelson insisted that his face should be covered. He knew, as he had always known, that seeing their Admiral had fallen would severely knock the confidence and morale of the men.
Nelson was carried down to the dark, small cabin where the surgeon, Beatty was at work. It was a grim scene. There was one light above the surgeon's table, so it was very dark. His tools, laid out, resembled that of a butcher - many arm and leg injuries led to amputation. Men lay, groaning and screaming, with little in the way of pain relief, and even when undergoing amputation were given merely a strip of leather to bite on. Limbs that had been chopped off lay in buckets to be disposed of later. Blood was everywhere. Such a scene had been described as a vision of Hell. And the surgeon operated on a first-come, first-serve basis. So someone with a broken toe could be tended before someone bleeding to death.
Nelson was taken to an area where he would be out of sight of any of the men, stripped of his clothes and covered with a blanket, and propped up. Reverend Scott, who had been handing out lemonade to the wounded, now came to Nelson's side, and Nelson said to him,
"Doctor, I told you so; Doctor, I am gone!" Then, he quietly added, "I have to leave Lady Hamilton and my adopted daughter Horatia, as a legacy to my country."
Beatty rushed to his side and examined him. Nelson told him that he had no feeling in his legs, and knew his spine was broken. He also found it difficult to breathe, and felt a gush in his chest every minute.
What Beatty found confirmed Nelson's knowledge that he was 'done for'. The musket ball had entered through Nelson's left shoulder. It had broken his collar bone and travelled diagonally downwards to pierce the pulmonary (lung) artery. This was the 'gush' he felt - his chest cavity was slowly filling with blood. The ball had continued on, broke a vertebrae, and finally came to rest in his spine. Beatty examined Nelson's back, and couldn't find an exit wound. There was nothing that could be done, and Nelson knew it. He told Beatty,
"You can do nothing for me. I have but a short time to live; my back is shot through."
He insisted that Beatty should attend others rather than waste time on him. Right up to the end, as throughout his life, he never lost his spirit of being able to put his subordinates above himself.
He may have known he was dying, but Nelson wasn't ready to give up yet. He gave his orders, and sent Hardy back up on deck with them. But apart from Beatty, Hardy, Scott, and the ship's purser, Mr Burke, who had helped carry Nelson below, no one knew the extent of the Admiral's injury.
Their Commander-in-Chief may have been dying below decks, but the battle raged on. Because Redoutable had closed some of her gun ports, and were now only firing muskets (though with great effect), some on Victory thought she had surrendered, and stopped firing. But Captain Lucas hadn't surrendered, and he sent a boarding party to jump across to take Victory. Luckily, Temeraire came up alongside Redoutable's other side, firing at her at close range. Redoutable was all but destroyed by now, and the continuing close-range shots meant that the risk of fire was great. So the Temeraire's gunners would throw water through the gun ports after each shot. They couldn't stop firing until the Redoutable surrendered, but a fire on board would be catastrophic for all ships close by.
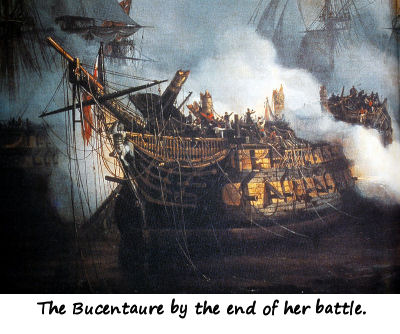
Nelson had envisaged a 'pell-mell battle' and, as he lay dying, that was exactly what was going on around him. The British Conquerer, Britannia and Agamemnon had arrived and battered the French Admiral Villeneuve's Bucentaure. Villeneuve sent one more signal, specifically for Dumanoir, ordering him to turn the van and come back. But he received no signal in reply, and knew that Bucentaure couldn't withstand much more without reinforcements. He surrendered, and the flagship was taken by the Conquerer.
As he was taken prisoner, Villeneuve asked to whom he had the honour of handing over his ship. Being told it was Captain Pellew, he said, "I am glad to have struck to the fortunate Sir Edward Pellew." The captain of the marines from the Conquerer, who had led the boarding party, told him, "It is his brother, sir," to which Villeneuve exclaimed, "His brother! What, are there two of them!"
Edward Pellew was a famous frigate captain, who would have been known by all the French as the captain who had caused a 74-gun ship-of-the-line to be run aground by just two frigates. There would have been no shame for Villeneuve in surrendering to the brother of such a formidable captain.
The 'pell-mell' battle that Nelson had envisaged was now raging. There was now no semblance of a line of battle on either side. It was a free-for-all, and the smoke smothering the close range melee action made it very difficult to see.
The melee close to Collingwood's Royal Sovereign was intensifying, as the Vice-Admiral's flagship continued its gruelling duel with the Santa Ana. The British Mars was still fighting the French Pluton. Nearby, the British Tonnant battered the Spanish Monarca into submission, and she pulled away. This freed up Tonnant to help Mars against Pluton. But the British Belleisle had taken a beating from the French Fouguex and, very badly damaged, she retreated. Fouguex took the opportunity to join Pluton against Mars. Eventually, Mars' rigging and masts were destroyed and, unable to be controlled, she drifted away. As for Monarca, she was unfortunate enough to drift into range of the British Bellerophon and, already bruised and battered, she quickly surrendered to her.
With Mars now disabled, Fouguex headed towards the Victory/Temeraire/Redoutable melee. By now, Victory was no longer firing, and her crew were turning their efforts to trying to separate her from Redoutable. Despite the extent of the damage each ship had received, neither had surrendered. Fougueux's perhaps had the potential to turn the tide of that battle in Redoutable's favour, but Temeraire was having none of it. She shot at Fougueux and, in the confusion and lack of vision through the smoke, Fougueux collided with her, and then surrendered.
Finally, Rear-Admiral Dumanoir, in the Formidable, realised that the battle was going disastrously, and decided it might be a good idea to take the van back and join in. There was still time enough for his ships - Duguay-Trouin, Scipion, Mont-Blanc, San Augustin, Intrepide, Heros, San Francisco de Asis and Rayo - to turn the tide of the battle, for they were all fresh and undamaged, and most of the British ships were damaged and their crew exhausted. But he had them all try to turn together, which was difficult due to the light winds and strong swell, leading to confusion. They had to use boats to try to turn the big ships, and it took a long time.
There weren't many things more demoralising than seeing a Commander-in-Chief surrender - something Nelson understood - and once Villeneuve surrendered the Bucentaure, the rest of the Combined Fleet began to lose heart. But they weren't quite finished yet.
The Santa Ana and Royal Sovereign were still battling it out. Nearby, the French Algesiras tried to sneak behind the Tonnant in order to fire at her stern, but slipped up and collided with her instead. Both ships attempted to send boarding parties, and they fought in hand-to-hand combat.
Meanwhile, the Bellerophon, having finished with the Spanish Monarca, turned towards the French Aigle, and locked in combat with her. The Aigle stopped firing, and her crew started throwing grenades over instead. Like Captain Lucas had done in the Redoutable, the idea was to clear the decks of the enemy ship. But instead, they caused a fire on board the Bellerophon. Dangerously close to where the ship's ammunition was kept, it could have caused a catastrophic explosion. Fortunately, the fire was put out in time. The Aigle then disengaged, but left the Bellerophon unmanageable.
The Defiance now made it to the battle, and went for the Spanish flagship, Principe de Asturias. Gravina's ship was considerably bigger, with 112 guns to the Defiance's 74, but her shots mostly went harmlessly through the rigging. Suddenly, the French Berwick collided with the Defiance, giving Gravina a chance to pull away. He saw that the French Achille was being heavily damaged by the British Revenge, the ship which he had had to escape from earlier, and so he had the Principe de Asturias fire at her, allowing the Achille to retreat. In turn, the British Defiance caught up with Gravina's flagship once more, giving the Revenge a chance to repair.
Back with Victory, Hardy saw that Dumanoir's ships were beginning to attempt to return to the battle, and he signalled for any available British ships to go to meet them. In response, Leviathan, Conquerer, Neptune, Ajax, Agamemnon and Britannia formed a rough line.
Finally, the two British flagships won their respective battles. Santa Ana surrendered to Collingwood's Royal Sovereign, and the Redoutable, all but destroyed, had no choice but to give in to Nelson's Victory. All ships involved were in a bad way, and Collingwood even had Royal Sovereign towed away from the battle, to avoid sustaining further damage.
This was followed by the surrender of the Algesiras to the Tonnant which then, together with the Dreadnought, fired at the Spanish San Juan Nepmuceno. Having had very little part in the battle, the Spanish ship nonetheless capitulated rather quickly.
The British Orion arrived to help the Colossus against the Spanish Bahama and French Swiftsure. The Swiftsure was able to get between the Bahama and Colossus, and was shot at by Colossus. Once she'd moved out of the way, Colossus returned to firing at the Bahama, which surrendered soon after. Colossus again shot at the Swiftsure, and she surrendered, too. With nothing left to do there, Orion went back northwards.
The French Aigle, having left the Bellerophon in pieces, turned her attention to the badly damaged and dismasted Belleisle, which was desperately trying to repair. The British Swiftsure (not to be confused with the French one!) came to the rescue, moving between the two ships. The British Polyphemus also shot at the Aigle, and so Belleisle was able to disengage completely.
The British Defiance now left Gravina's flagship, the Principe de Asturias, alone for a bit, and joined in with the beating of the Aigle. Her Captain, Philip Durham, attempted to send a boarding party. They were at first beaten back, but eventually the Aigle surrendered to them. This was quickly followed by the surrenders of the Berwick, Argonauta and San Ildefonso.
Dumanoir's ships finally made it to what remained of the battle, but far too late. The San Augustin, Intrepide, Heros, San Francisco de Asis and Rayo headed straight for the cluster around Victory and Bucentaure, hoping to rescue Admiral Villeneuve. San Augustin very quickly surrendered to the Leviathan. The Intrepide bravely went down the British line, firing at each ship she passed, but was cut off and fired upon by the Orion and the ever-present Africa (Captain Digby was still going strong!)
His flagship, the Formidable, along with the Duguay-Trouin, Scipion and Mont-Blanc, headed for the last ships in Nelson's column, the Spartiate and Minotaur. But they didn't get to the British ships in time to cut them off, and Spartiate and Minotaur shot at Formidable, then went up what was left of the French line, shooting at every ship they passed. Dumanoir's ships were shot at by Victory, Mars, Royal Sovereign, Temeraire, Tonnant and Bellerophon. Dumanoir gave up and retreated, but not before inexplicably firing at the Spanish ships that had surrendered. Many on all sides of the battle later expressed disbelief and disgust at this action, and one of those Spanish ships, the Argonauta, even offered to help fire at the French for their treachery. It was another example of the difficult relations between the allies. Later, as a prisoner-of-war, Dumanoir denied that the shots were deliberate. But for now, he managed to escape to the east with Rayo, Heros and San Francisco de Asis.
The Intrepide, meanwhile, ended up surrendering after its beating by Orion and Africa. The Spanish Neptuno had attempted to follow her down the line, but was cut off by the Minotaur and Spartiate, and surrendered.
The battle was almost done. As a last hurrah, the French Achille, attacked by the Prince, caught fire thanks to the muzzle flash from musketeers in the rigging catching on the sails, and blew up, in a dramatic scene reminiscent of the destruction of the Orient at the Nile.
Of the thirty-three ships that had made up the Combined Fleet at the beginning of the day, eleven escaped to Cadiz with Admiral Gravina, four escaped with Dumanoir, one blew up, and the rest were taken as British prizes. Though some British ships were very badly damaged, some to the point of needing to be towed, none were destroyed or taken. There was also almost half the loss of life on the British side as on the French/Spanish.
![]()
Copyright Vicki Singleton 2013.